I know I always have a lot of questions when starting to use a new media. A while ago I contributed some thoughts in another place about different approaches to getting started in soft pastels for the first time. It was based on the range of approaches I adopted when I started to use soft pastels for the first time. This is an updated version of that piece.
 #1 Reference the experts - take a long look at some really good pastel drawings and paintings
Sleepy baby c 1920 by Mary Cassatt (1844 -1926)
Pastel on paper, 25 1/2 x 20 1/2 in. (64.77 x 52.07 cm)
Dallas Museum of Art / source Wikipedia
Pastel on paper, 25 1/2 x 20 1/2 in. (64.77 x 52.07 cm)
Dallas Museum of Art / source Wikipedia
I found that when I saw what can be done with pastels I was really inspired to try and achieve something similar.
RECOMMENDATIONS#2 Acquire the basics - Get a good basic set of medium soft pastels and build slowly from there
Get a good sense of what can be achieved in soft pastels:
- Take yourself off to an art gallery and go and look at some really good pastels.
- Review the work of good pastel artists in history - artists like Edgar Degas, Jean-Baptiste-Siméon Chardin, Quentin de La Tour, Rosalba Carriera and Mary Cassatt
- Find out when your local pastel society has its annual exhibition - for example, the Annual Exhibition of the Pastel Society in the UK opens on 10th June in London.
- Look at the websites of good pastel artists - past and present - for the same reason.
Pastels which are too soft or too hard probably give the wrong impression of soft pastels and might turn people "off" rather than "on" to working with soft pastels.
I'd always recommend starting with a good basic set of pastels which are categorised as being 'medium' soft pastels (as opposed to 'very soft' and 'not very soft'). I started with a set of 32 Rembrandts - which I continue to use under softer pastels. They weren't as expensive as some pastels, provided a good range of colours and were relatively easy to get hold of in open stock of in the UK. If you choose one which is difficult to find in open stock you're going to be cursing when you lose or finish a popular colour!
The brand of pastels is probably less important than whether the pastels feel right to you. Beware that 'feel' isn't conclusive until you've found the support you want to work on long term. So be prepared to experiment and to make some changes.
RECOMMENDATIONS#3 - Try a range of supports - and find out which suits you best
- Start with a basic set of medium 'soft' pastels
- Try a few softer pastels from open stock in different ranges until you find one you like. Build up a small stock and use them for some time before making the (big) financial commitment to buying the full set
- When you're certain you want to continue with pastels, get hold of some harder pastels (eg conte sticks or nupastels) in useful colours. They're very good for getting harder edges and laying down initial marks. I always buy colours I will use rather than complete sets.
- Keep experimenting with samples of different brands
It's my belief that different people respond very differently to different types of surfaces. My pastel work only took off when I tried an abrasive pastel surface for the first time. I wasn't getting on with paper at all and absolutely adored the way the abrasive surface gripped the pastel. Others will feel completely differently - but thwat's important is that you find the 'feel' of a support which works best for you and allows you to do what you want to do to.
On Making a Mark Reviews, I'm currently producing a number of summary reviews of some different supports for use with pastels or coloured pencils on Making A Mark Reviews. Yesterday I had a summary Product Review : Clairefontaine Pastelmat
and later today I'll be posting about Ampersand Pastelbord. I'll also be covering the various pastel papers and other abrasive supports in future.
RECOMMENDATIONS#4 Art Instruction - get a good book
- Try different surfaces until you find the one which feels right for you.
- Try a pastel paper and try an abrasive support. They're not all the same - however you'll soon find out whether you want to try more pastel papers or more abrasive supports
- Keep trying new supports - you'll be surprised at what's now available!
An important step is to get hold of one or two good books on the subject. Preferably one which provides a lot of help in the text as well as in the pictures. A good example is one of the books which really stimulated me when I was starting out was The Pastel Book by Bill Creevy. I learned an awful lot about pastels from that book.
I've included a range of pastel books rate in Pastels - Resources for Artists - my resources for artists information site for pastel artists - both newbies and the more advanced. It includes books about pastel portraits, pastels plein air, pastels by past masters etc as well as a range of art instruction books.
I'll be doing more detailed reviews of the pastel books that I own on Making A Mark Reviews in coming weeks and months.
#5 Art Instruction - try a workshop with an experienced pastel artist and art tutor
A pastel workshop is a great way of picking up tips earlier rather than later - otherwise characterised as how to avoid learning the hard way! However to get great tips you need to find a great tutor!
RECOMMENDATIONSThis is the post I wrote after doing a pastel workshop with Sally Strand - The best ever workshop - pastel painting with Sally Strand
- Pastel societies often run workshops. You can usually be assured that a pastel society will only contract with reputable tutors in pastels - either from their own members or popular/reputable pastel artist who society members want to learn from.
- ALWAYS have a really good look at a pastel tutor's own work before you sign over any money. Being able to work in pastels and being a pastel artist are two completely different things! Artists who primarily work in another medium may not offer the same calibre of of expert help in pastels - hence why you need to look at the work and what they mainly produce. There are also a lot of good tutors out there and there are quite a few mediocre ones as well. Having a look at the work tells you something about their own skill levels and whether they have anything to teach you. However it doesn't tell you whether or not they can teach.
- Sounding out people who have done workshops with a tutor or looking for reviews of pastel workshops on the Internet can be helpful in terms of finding out about the calibre of the tuition - as opposed to the artwork.
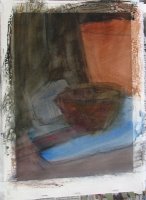
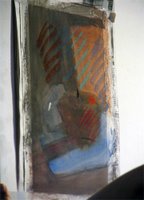
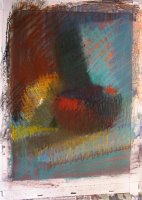
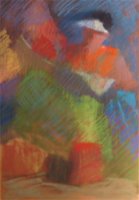
Part completed Still life demo and part-completed life model - both on a 1/4 sheet of watercolour paper
Set-up and all images copyright Sally Strand
If you've ever done a workshop and it's somebody who you'd recommend why not do a blog post? It's a great way of thanking the artist for good quality support as it's a sign of appreciation which keeps on giving!Set-up and all images copyright Sally Strand
Do comments below if you have any more tips and guidelines for people who are starting out with soft pastels.


A couple of tips:
ReplyDeleteIf you can't find or cannot take a workshop try tutorial DVDs. They give a good idea of how to physically use a medium, e.g. how to hold pastels and how to get specific effects.
Be aware that pastels give off dust. It may be obvious but some people with breathing difficulties cannot deal with pastels. I only suffer from hayfever in the summer but couldn't use pastels as they made my chest tight and caused coughing fits.
A great post. Thanks for the information.
a lot of good advice there Katherine :>)
ReplyDeletealso be aware that if you have skin problems - dry skin, psoriasis, eczema - the pastels may upset your hands, leaching all moisture from them and leaving them dry and exacerbating any problems.
They are also a nightmare to frame! I've just done 3 for a pastel exhibition and there were nearly tears before bedtime! I've vowed to let my framer do the framing for me next time - even if I'm reusing frames I have.
I love Unisons
A very sound five guidelines, Katherine.
ReplyDeleteThere is no reason why a motivated artist shouldn't have good confidence in taking up this wonderful medium.
Very informative post. You may have just inspired me to try my hand at pastels once more. I think what turned me off was the support I was using. Perhaps I need something abrasive with more tooth?
ReplyDeleteHi,
ReplyDeletereally good post.
For us in Europe it's not always that easy to find good workshop teachers.
For those who are interested to take a workshop with Margaret Dyer:she is holding one in August in France near Paris. This way you don't have to travel all the way to the USA.
A great summary of how to start out in pastels. Mirrors my own experience. I agree absolutely about sanded paper and how much you can learn from a good book. I just started a you tube Pastel Painting Course for beginners covering the basics that past students have found helpful when starting out. Here's a link to a 10 minute video on Choosing Pastels where I cover similar information with samples of lot's of different pastel types. https://www.youtube.com/watch?v=XTCzZx7h32Q
ReplyDeleteI enjoyed your blog and will be back.